Your cart is currently empty!
Halloween Fringe Photo Backdrop

Halloween Fringe Photo Backdrop
Happy Halloween!
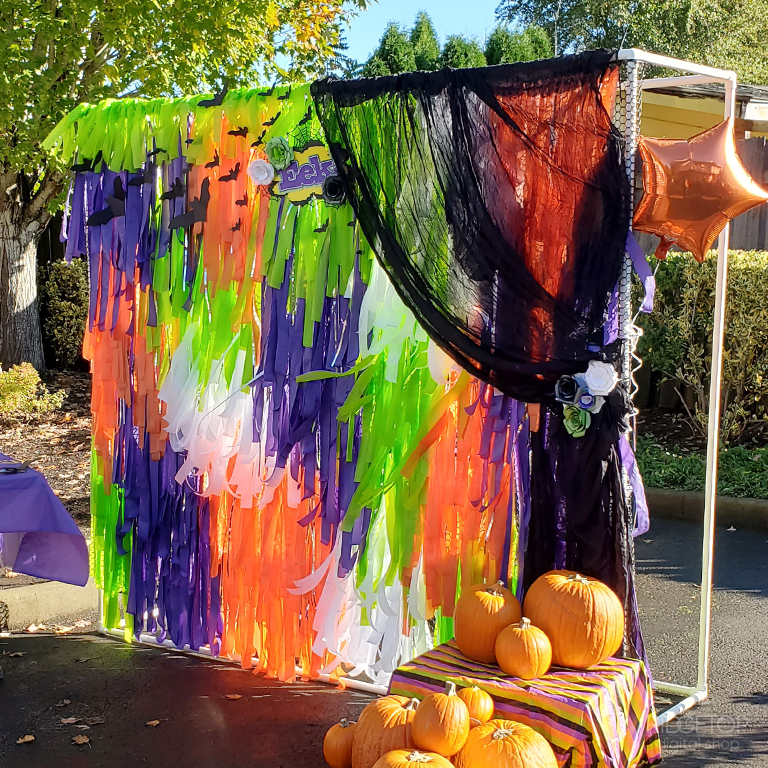
I was asked to create a backdrop for an outdoor trunk or treat. In Oregon, there is a good chance this could have been a rainy event. I have a pop up canopy, but still opted to create something that could withstand getting damp. I went with a fringe backdrop made from strips of plastic tablecloths. And, guess what? It didn’t rain. It was a beautiful day. Even so, I’m glad I went this route. The colors are so fun and the backdrop is very durable. I’ve reused it multiple times.
Let’s get started.
SUPPLIES
- Backdrop Support
- Plastic Tablecloths
- Rotary Cutter or Scissors
- Plastic Fencing
- Zip Ties
- Various Decor Elements
BACKDROP SUPPORT
The finished fringed backdrop has a bit of weight to it. A purchased backdrop stand might work. But, I’m not confident the one I have could support it. So, I used my trusty pvc pipe support. I used the Square Backdrop Support directions, but added an additional vertical pipe in the center of both the front and back.
PVC PIPE SUPPORT SUPPLIES
- 6 – 3/4″ PVC Pipe, 78″ long
- 8 – 3/4″ PVC Pipe, 42″ long
- 4 – 3/4″ PVC Pipe, 18″ long
- 8 – 3/4″ PVC Fitting: 90 Degree Socket
- 4 – 3/4″ PVC Fitting: Tees
- Pipe Cutter
HOW TO

1. CUT COLORED STRIPS
Using a rotary cutter or scissors, cut your tablecloths into strips.
I was going for a disheveled look, so my strips are 1.5″ wide and vary in length from 4.5′-6.5′.
The number of strips needed will vary on the height and width of you ideal backdrop. Mine was 7′ wide by 6.5 feet tall and I needed about 540 strips.

2. ATTACH FENCING TO PVC SUPPORT
Cut the plastic fencing to fit the width of your support stand, adding 1.5′-2′.
Starting at the top, wrap the ends of the fencing around the pvc pipe on both sides and secure with zip ties.
Repeat the process with another piece of fencing.
Zip tie the separate fence pieces together.

3. ATTACHING COLORED STRIPS
To add the fringe strips to your backdrop, fold it in half and push through a hole in the fence. Then pull a couple inches back through a nearby hole. Create a loop at the center and place the fringe ends through the loop. Pull the ends to make a taut knot.

4. PLACE FIRST LAYER OF COLORED STRIPS
Starting near the bottom of the backdrop, attach colored strips so they nearly touch the ground. To create a backdrop with groups of colors, add 20-40 of one color before switching to the next color.

5. ADD REMAINING COLORED STRIPS
Work your way up and across the backdrop, adding colored strips. There’s no right or wrong way. It just depends on your desired finished product.

6. THE TOP EDGE
When you reach the top, place colored strips in a straight line for a polished look.

7. OPTIONAL DECOR ELEMENTS
Depending on your theme, you may want to add other elements to your backdrop. It is absolutely not necessary. The bright colored fringe makes for a fabulous backdrop, as is.
Enjoy!


This backdrop is quite versatile. I’ve used it many times including three times for Halloween, a New Year’s bash, and a Grad Party with the Nacho Average Grad theme. I just love it.
I’d enjoy seeing your version of a fringe backdrop.
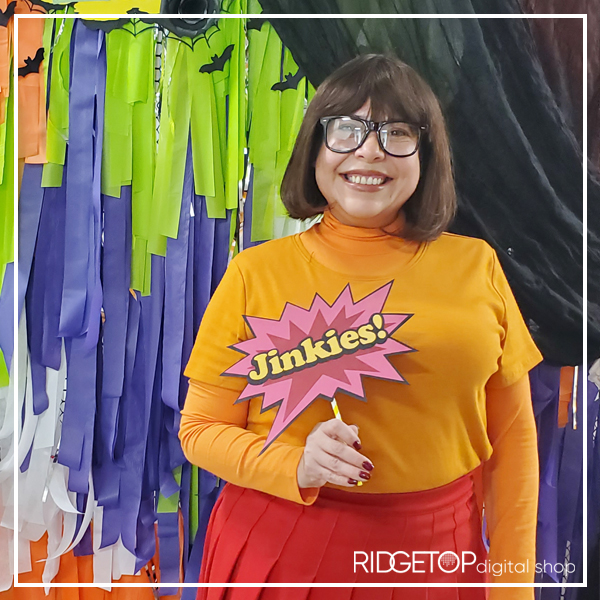
⬇ Coordinates with this photo prop set ⬇

Halloween Photo Booth Props
Thinking about creating your own Halloween Fringe Photo Backdrop?
Pin This ⬇️

Follow us
Download ➤ Print ➤ Create ➤ Enjoy!
Latest Posts
-

2024 Naughty List Free Printable
Are you on the Naughty List this year? Spread some holiday cheer and spice up…
-

Halloween Fringe Photo Backdrop
Halloween Fringe Photo Backdrop Happy Halloween! I was asked to create a backdrop for an…
-

PVC Pipe Photo Backdrop Support
PVC Pipe Photo Backdrop Support With so much variety in photo booths and photo backdrops,…

Leave a Reply